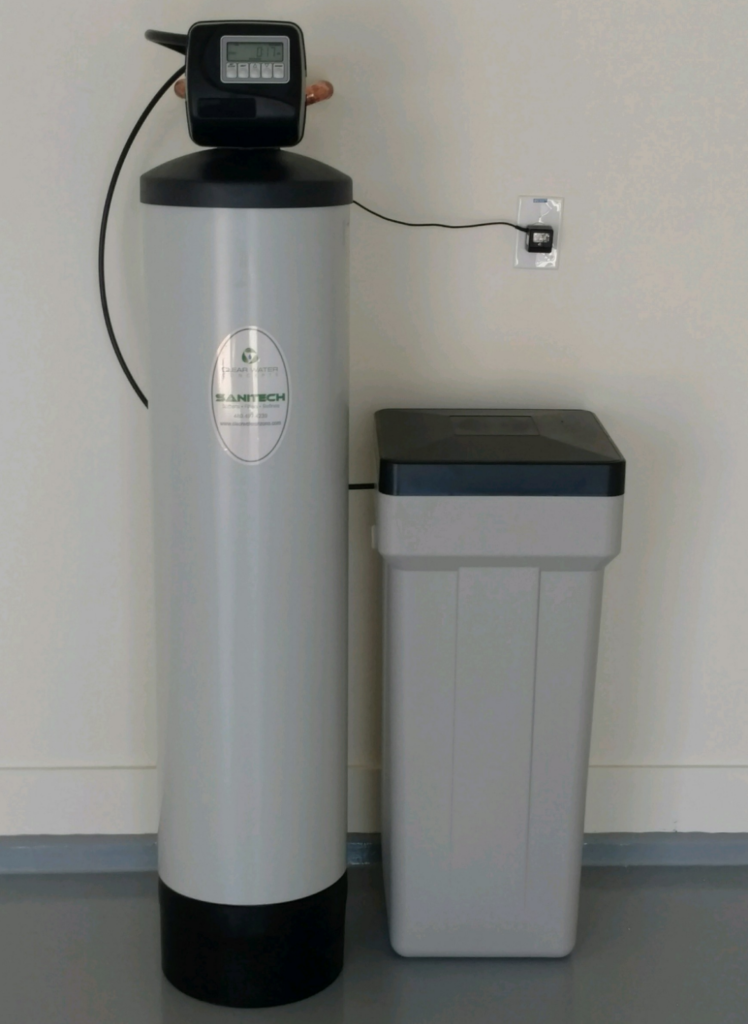
Regularly servicing and maintaining your water softener will keep it running efficiently and prolong its life. A water softener takes minerals, including calcium, magnesium and iron, out of hard water and replaces them with potassium chloride or sodium, making the water feel softer on your skin and hair. Water softening also prevents damage to your home’s plumbing fixtures, pipes and appliances.
With proper maintenance, you will save money over time by keeping your plumbing and appliances in good shape longer, eliminating the need to replace them. However, if you notice signs that your water softener isn’t functioning properly, such as you’re experiencing dull hair, scratchy clothes or build-up in your tub or sink, then you’ll want to explore the option of replacing your unit.
In this guide, learn everything you need to know about water softener maintenance.
How to Install a Water Softener
Installing a water softener can be done by homeowners if a water softener loop has been pre-plumbed into the home. Without a loop, the operation becomes much more complicated, requiring new plumbing lines to be professionally installed. This adds to the cost of installation.
With or without a water softener loop, you are more likely to save money over the long haul by having an expert install your water softener. Unless you have plumbing experience, fully understand the steps involved and know how to work with the required plumbing tools, installation is best left to a professional.
If you want to install the water softener, however, carefully follow the manufacturer-specific instructions and read the next section for more details.
How Can You Install a Water Softener Yourself?
Before installing your water softener, familiarize yourself with the required tools and make sure you have all needed supplies on hand. You might also want to recruit an assistant. Proper installation will ensure your water softener operates efficiently, lessening the chance you’ll need to call in a professional later.
Your unit will come with specific manufacturer instructions. Here is an overview of the steps to install a water softener when your home already has a water softener loop.
Installation steps:
- Shut off the water and drain the pipes.
- Turn off the water heater.
- Determine where the water softener should be installed on the main line.
- Cut into the main line and install a fitting for your specific model.
- Measure pipes, cut them to fit and attach them to the unit.
- Secure the hose to the unit and feed it to the drain location (leaving at least 2 inches above the drain hole).
- Connect the overflow tube to the brine tank.
- Remove sediment and debris by flushing water through the system.
- Plug the unit into an electrical outlet and set the valve to the backwash position.
- Program the time and other necessary settings.
Get more detailed steps on how to install a water softener.
Water Softener Installation Costs
Depending on the type of water softener you choose and the size of your home, a water softener installation can range between $800 and $3,000. Every house and installation is different, so if any special issues arise during installation, the cost could increase. Check out our water softener pricing page for more information on costs associated with water softeners.
How to DIY Common Water Softener Maintenance Issues
It’s never too early to familiarize yourself with how to maintain water softener products after they’re installed. Next, find instructions for several water softener maintenance tasks, including refilling the salt, preventing salt bridges and cleaning system components.
How to Refill Salt in a Water Softener

When you select the right kind of salt for your water softener, the unit will operate optimally, last longer and protect your household appliances. But how do you choose? You’ll want to consider the hardness of your water, the type of water softener system you’re using, its size, your water usage and your preferences for maintaining the system.
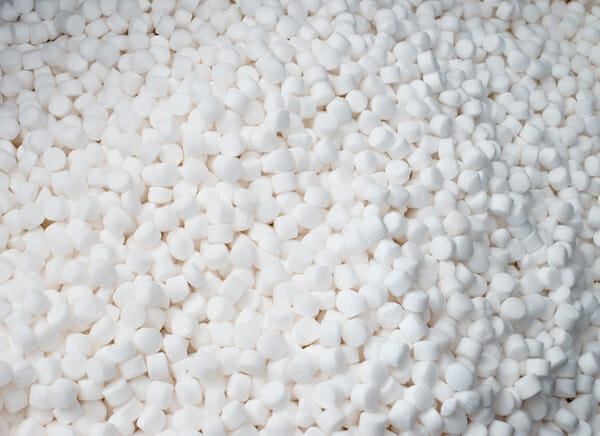
The following types of water softener salt offer varying pros and cons. Learn more about these salt types.
| Salt Type | Pro | Con | When to Use |
| Evaporated | Highest purity | Most expensive | With very hard water |
| Solar | More eco-friendly | Lower solubility level | With moderately hard water |
| Rock | Less expensive | Less pure; contains high amount of calcium sulfate | When the water softener manufacturer recommends it |
| Block | Very pure; resists bridging and mushing | Brine tank water level must be raised to cover entire block | Only when the water softener manufacturer recommends it |
| Potassium Chloride | Safe salt alternative | More expensive than sodium chloride; need to increase dosage | If you prefer potassium rather than sodium in your water |
Should You Call an Expert?
Most homeowners should be able to easily refill their brine tank with salt, so contacting a professional shouldn’t be necessary. If you’re unable to lift a 40-pound bag of salt, however, use a small rolling cart to place your salt bag next to the brine tank and see if you can refill the salt one scoop at a time.
If refilling the tank proves too difficult, ask a friend or neighbor to help. Or, contact a professional for assistance.
Water Softener Salt Costs
For a regular 40-pound bag of replacement salt, you’ll pay anywhere from $5 to $25, depending on the purity rate and where you buy it. Water softener salt can be found at most home improvement stores. Costco’s water softener salt is a popular choice and costs about $17 for the standard-size bag.
A family of 4 will use around one 40-pound bag of salt in a month. If you have more than four people living in your home, or if the water is very hard, your household can expect to use more than one bag of salt a month.
How to Drain the Brine Tank on a Water Softener
An excellent time to clean your water softener is when the salt is low. The first thing you’ll want to do is drain the brine tank using one of the following methods.
- Scoop the water out of the tank and into a bucket. You can return the water to the tank after cleaning if the water isn’t too dirty.
- Suck the water out with a wet vacuum.
- Manually start the regeneration process, which will automatically draw the water out of the tank.
- Disconnect the fill tube and overflow hose from the tank. Remove the entire tank to empty into a drain.
Also, remove the salt grid if your system has one. With an empty brine tank, you’re now ready to clean it, as well as the resin tank, and sanitize the water softener.
How to Clean a Water Softener
The best practice is to clean your water softener every 3 or 4 years, if not sooner. You can also sanitize the entire system to remove any bacteria, mold or fungi. Here’s how to clear a water softener.

Cleaning the Brine Tank
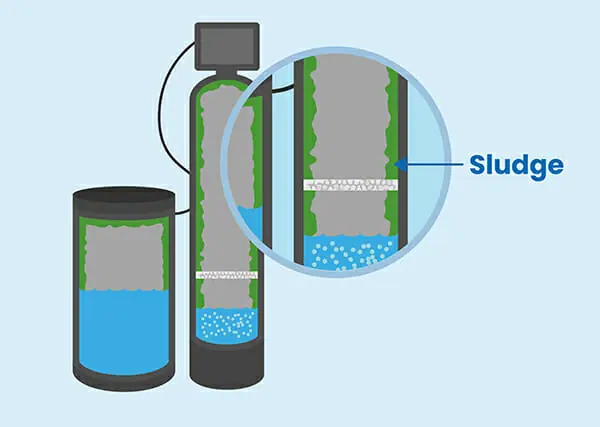
With your brine tank empty, get rid of any salt and sludge at the bottom. Using a water hose to rinse out the tank, dislodge residue with a shovel and allow the wet vacuum to remove all sediment.
When the sludge is out, use a mix of water and dishwashing detergent to scrub the tank’s interior. Rinse it completely, then put the tank back into place. Add new salt and about 3 gallons of water to the tank. Set your system to start a regeneration cycle during the upcoming night.
Cleaning the Resin Tank
Depending on how much gunk your resin tank accumulates, experts suggest cleaning the resin tank every 6 months or so. Cleaning the bed of the resin tank will revitalize its softening capacity, ensure all system parts work well and even improve the taste of your water.
There are several resin cleaners on the market. Be sure to check your manufacturer’s recommendation for the perfect resin cleaner for your system, then carefully follow the instructions on the cleaner package.
Sanitizing the Water Softener
It’s easy to sanitize the entire water softener system. Most people use bleach (5.25% sodium hypochlorite) because it works with greensand, zeolite or polystyrene resins. Check your manufacturer’s website for details, but a general rule of thumb is to use 1.2 fluid ounces per cubic foot of polystyrene resin and add it to the brine before you backwash the system. During the brining cycle, the bleach will dissolve and enter the resin tank. Then you will run the regeneration cycle.
Allow the bleach to saturate the resins at least 1 hour to ensure a comprehensive sanitization, then follow up with a thorough rinsing of the resin bed.
How to Prevent Salt Bridges in a Water Softener

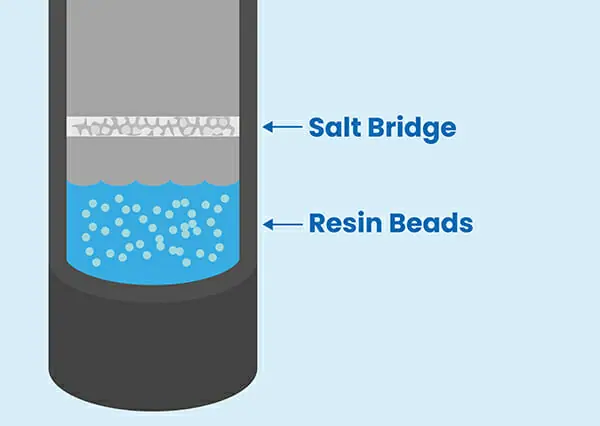
Salt bridging, or salt clogging, interferes with the regeneration process. Salt builds up a crusted bridge where the salt can’t make it into the water at the bottom of the brine tank, preventing brine from forming. You can prevent salt bridges by filing your brine tank two-thirds full, by not adding any salt and by allowing the water level to decrease to one-fourth full.
If other issues pop up with your water softener, you should be able to troubleshoot the cause and most likely take care of it yourself.
How to Replace Water Softener Resin
You’ll want to replace your resin if it’s been damaged from long-term exposure to chlorinated city water, if it’s been sitting unused for weeks or months or if it contains algae or fine sand. The following are steps to replace your water softener’s resin.
- Determine the amount of resin you’ll need by reviewing your owner’s manual.
- Place the system in bypass and unplug the power cord.
- Disconnect the plumbing and remove the control head.
- Lay the softener tank on its side or into a trash can.
- Use a garden hose to rinse out expired resin.
- If your water softener uses a layer of gravel at the bottom, save old gravel.
- Stand the tank upright and cover the opening in the product tube.
- Refill the gravel so it covers the screen.
- Fill the tank with new resin until it’s half-full.
- Uncover the product tube.
- Reattach the control head and reconnect plumbing.
- Place the system in service mode and start a manual regeneration.
- Test the water for the softness level.
Your water softener will be once again ready to operate at top-notch efficiency. The new resin should last around 20 years under ordinary circumstances.
Clean the Venturi Valve
Keep your venturi valve clean of sand, sediment and dirt to ensure your water softener works properly. During regeneration, water is sucked from the brine tank by the venturi and nozzle, so it should be cleaned with soapy water twice a year, or when the brine tank gets clogged.
Unscrew the valve cover to remove the parts for a thorough cleaning. Before you take things apart, be sure to relieve water pressure to avoid injury or damage to parts.
Exercise the Valves
Keep the valves in excellent working shape by adjusting them once a month. For the bypass valve, turn it to shut off the water supply temporarily, then put it back where it was. Exercise the intake and outtake values by twisting them to the off position and back to their original position.
Be on the lookout for leaks or drips around the valves. If you find one, take it apart and replace worn seals or washers.
Water Softener Maintenance Is Important
Understanding how your water softener components works, how to refill the salt and how to keep the system clean is vital to the longevity of your water softener. While a few homeowners with specialized skills can install their own water softener, the best option for efficient operation and warranty integrity is to ask a professional to do the installation.
Once installed, a water softener can be easily maintained by the homeowner with a little know-how and periodic cleanings. Water softener maintenance cost should be minimal if you immediately address any issues.
Water softener suppliers usually offer maintenance packages with reasonable annual fees for regular servicing that makes having a top-performing, long-lasting water softener system effortless for the homeowner.
Contact the experts at Clearwater Concepts to learn more about water softener maintenance, care and replacement. We’re eager to help and share our expertise.


